International Air bookings are bookings that transport the freight via Air.
To create an international air booking:
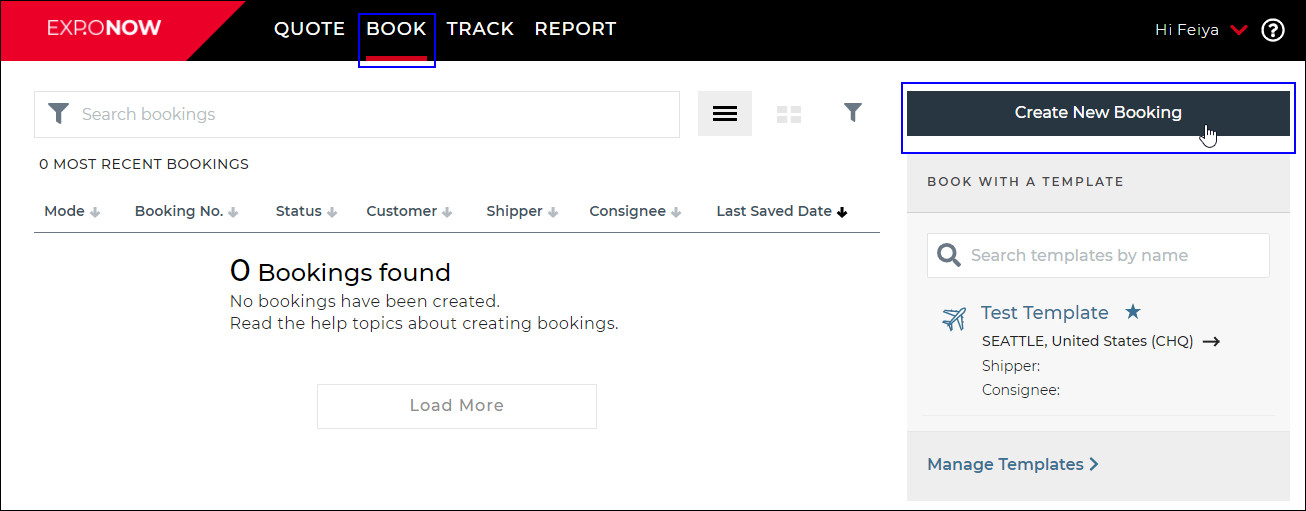
1 Click BOOK from the top navigation, then select Booking (Beta). Click Create a Booking. You can also create a booking using a template, see Booking Templates for more information.
Figure 1: Create A Booking
2 A panel will appear. Select the Customer from the drop-down list that you want to create the booking for. Select Air for the Mode, then click Create Booking.
Q: Why can't I choose a different mode?Q: Why can't I choose a different mode?
A: Currently, only International Air bookings can be made in EXP.O NOW.
We are working to allow the ability to create Ocean bookings at a later date, as well as the other modes.
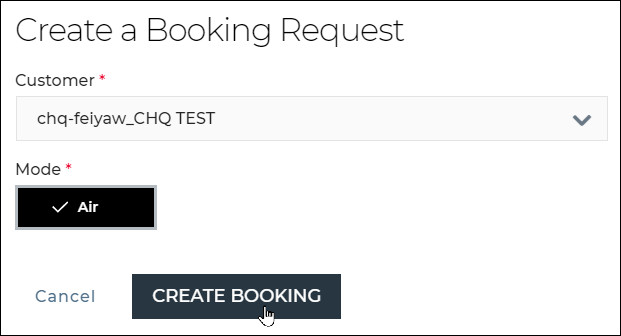
Figure 2: Create a Booking Request Panel
3 A draft booking will appear. You can select a template to be applied to your booking at any time from the drop-down list at the top. Switching templates will cause all changes to be lost. See Booking Templates for more information about templates. Click Save at any time to save your work. Click Delete Draft to delete the draft booking and return to the BOOK home page.
 ) next to a section means that you have not started filling in the section yet.
 ) next to a section means that there is still required information needed to be filled in for that section.\
 ) next to a section means the required information has been filled in.
Click the links below to jump to the section for more details:
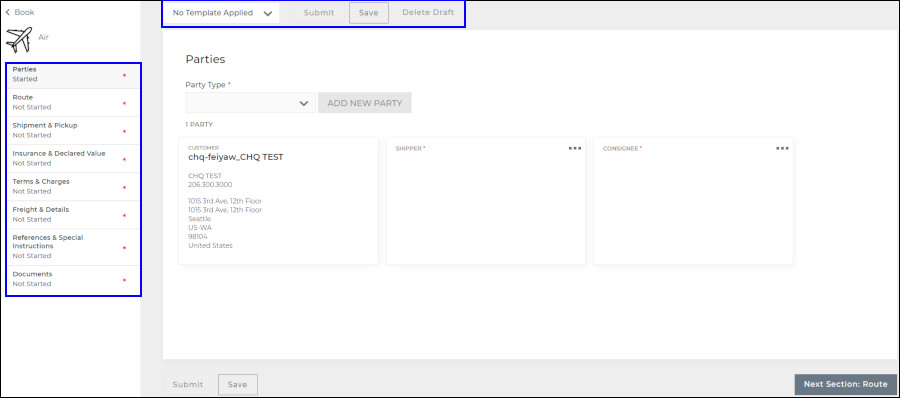
Figure 3: Draft Air Booking - Navigation
4 When you are finished filling in all of the required fields in the booking (marked with a * red asterisk) you can click Submit to send the booking to Expeditors. See View Recent Bookings for more details on how to view submitted bookings or edit draft bookings.
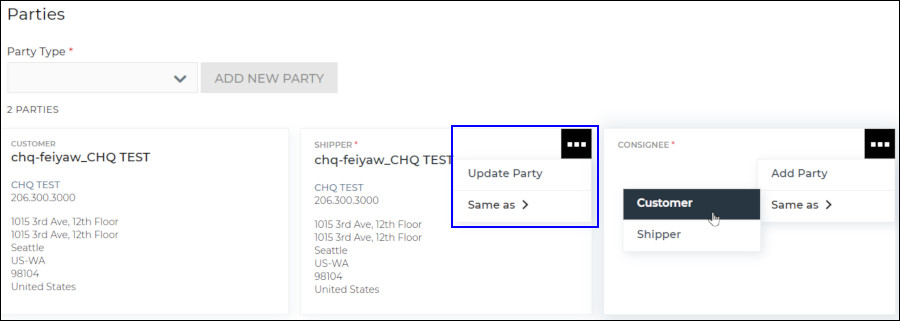
Figure 4: Parties Section
To enter the address and contact information for a party, click the menu icon ( ) and select Add Party, which will bring up a panel where you can enter the details for the party, or select Same as and choose a party to copy the details of.
To edit a party, click the party name or click the menu icon () and select Update Party and an Edit Party panel will appear.
If you need to add additional parties, first select the Party Type from the drop-down list and then click Add New Party. If you are looking for Bill-to Party, it is in the Terms & Charges section.
Bank
Consolidator
Deliver-to Party
Export Customs Broker
Exporter of Record
Forwarder
Import Customs Broker
Importer of Record
Intermediate Consignee
Manufacturers
Notify Party
Signer
Sold-to Party
Stuffing Location
Ultimate Consignee
USPPI
Weigher
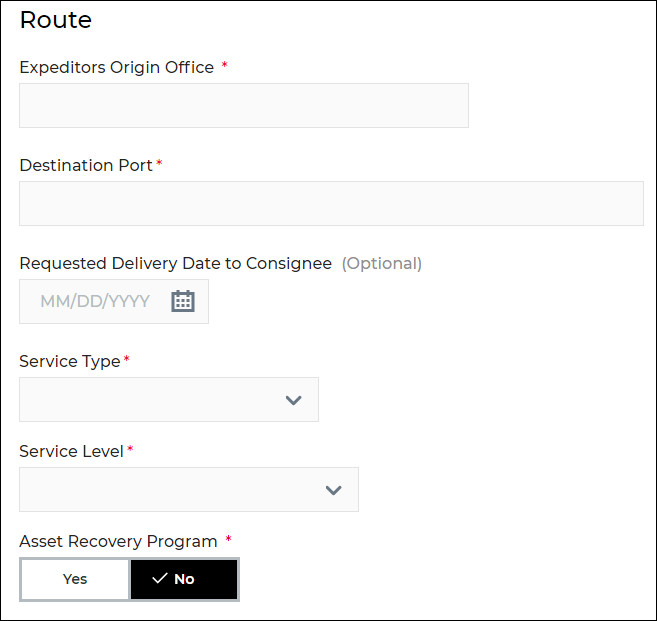
Figure 5: Route Section
For the Expeditors Origin Office and Destination Port, enter the city or port you are looking for and suggestions will automatically appear as you type.
Select the Service Type and Service Level from the drop-down lists.
Asset Recovery Program is also known as IT Asset Disposition, the process of collecting used IT resources. Select Yes to track and give visibility to Asset Recovery Business.
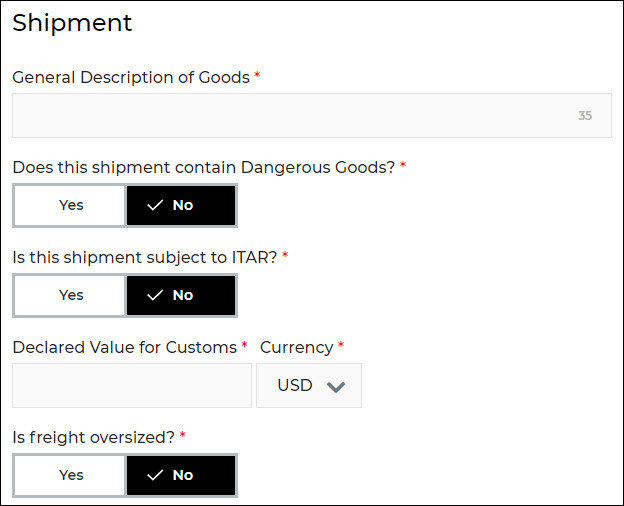
Figure 6: Shipment Section
Enter the General Description of Goods, the number to the right of the field is the number of characters you are allowed for the field.
If you select Yes for Dangerous Goods? you will see additional fields. You must select if the Shipper Declaration is Attached or Not Requested. See Documents for more information on attaching documents.
If you select Yes for Is Freight Oversized? you will see an additional Oversize Description field where you must enter a description of the oversized freight.
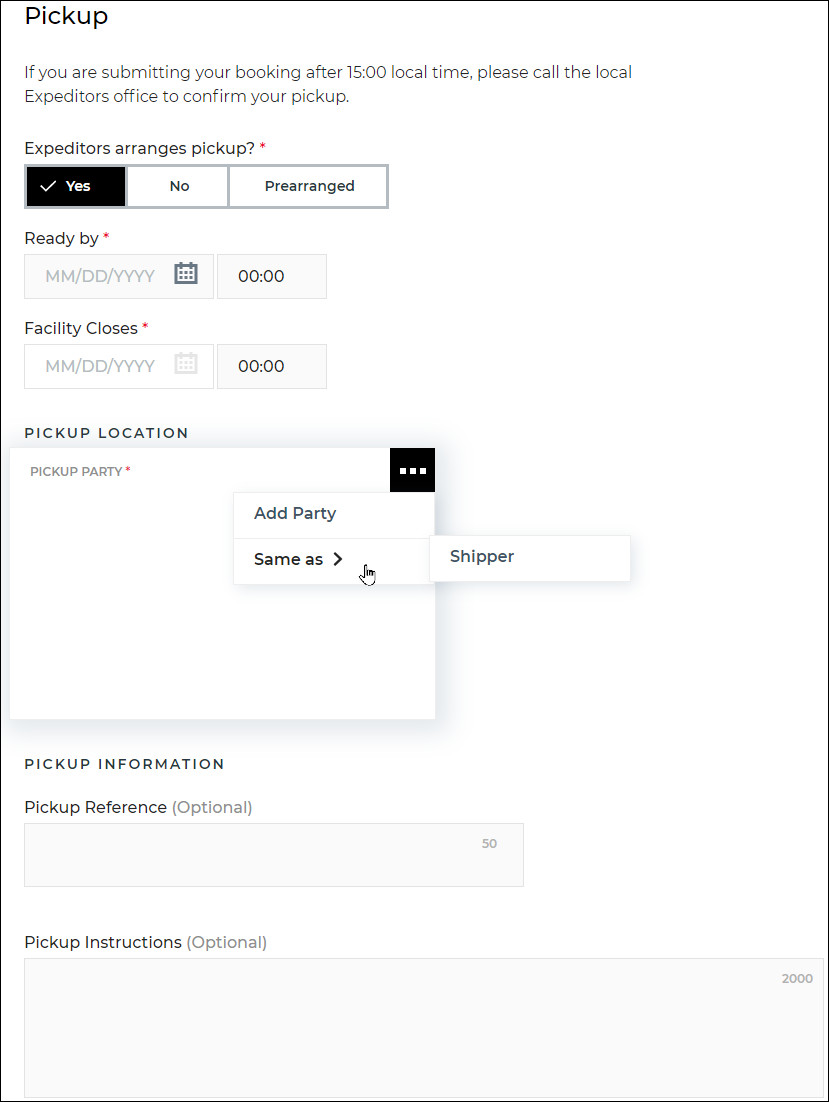
Figure 7: Pickup Section
Select Yes if Expeditors is arranging the pickup, No, if another company will be doing the pickup or Prearranged if pickup has already been handled. Enter the information needed depending on which option you choose. To add party information, click the menu icon ().
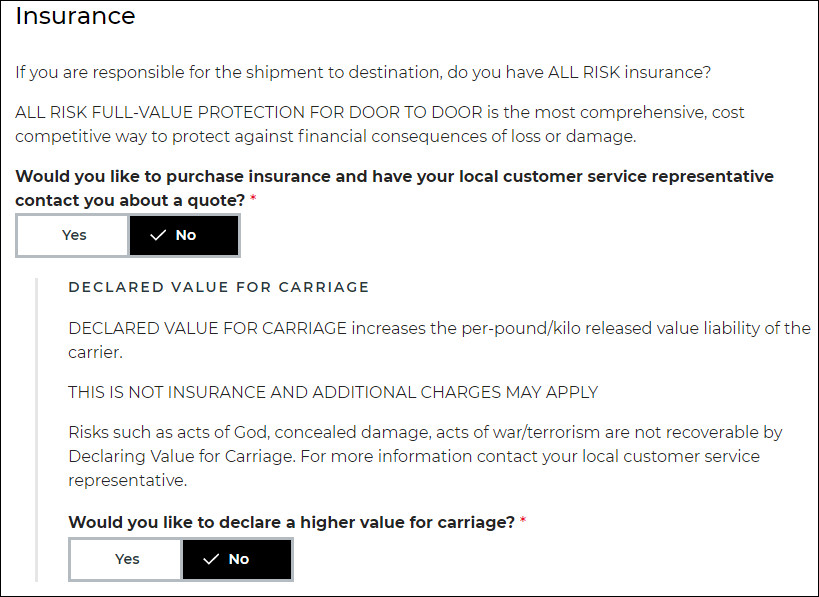
Figure 8: Insurance Section
To insure the shipment, select Yes and enter the Insurance Amount. If you don't want to insure your shipment, you can instead Declare Value for Carriage. Select Yes and enter the Declared Amount.
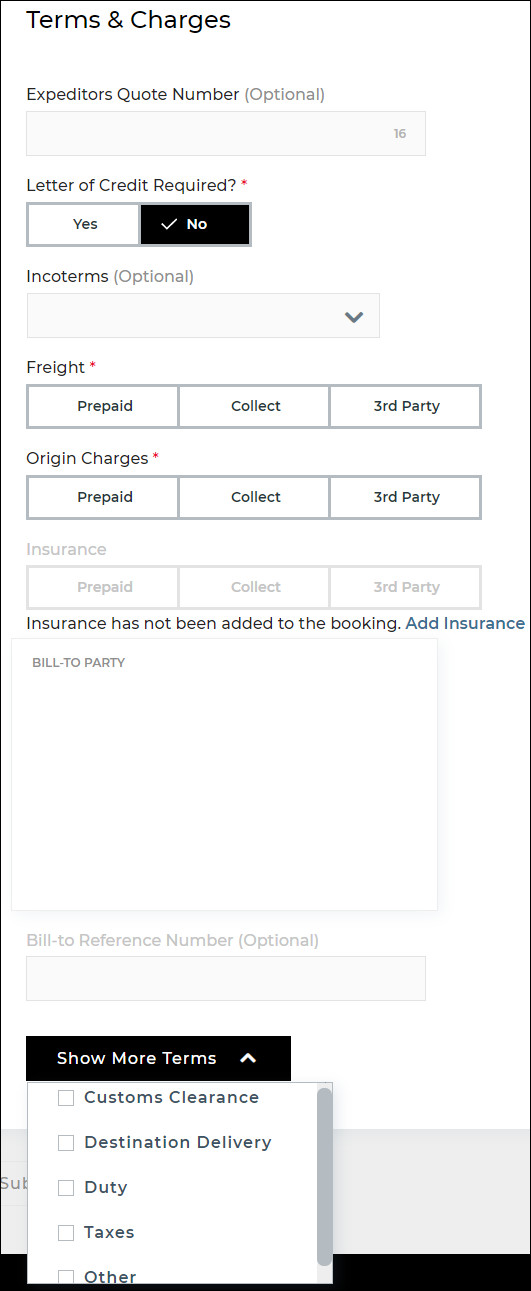
Figure 9: Terms & Charges Section
Select Yes or No for if a Letter of Credit is required.
For the Freight, Origin Charges, and Insurance, select the method of payment, Prepaid, Collect, or 3rd Party. If you select 3rd Party, you must fill in the Bill-To Party section. Click the menu icon () to add the party information.
To add additional terms, click the Show More Terms drop-down list and select the terms you want to add. To delete terms, unselect it from the drop-down list.
Select if you want to enter the freight as a Totals or in Multiple Lines.
If you select Totals, enter the totals for the freight in the fields.
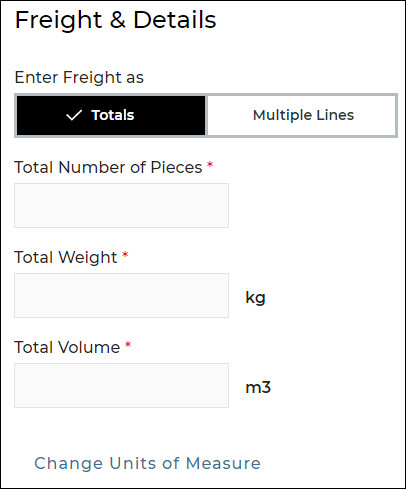
Figure 10: Freight & Details Section - Totals
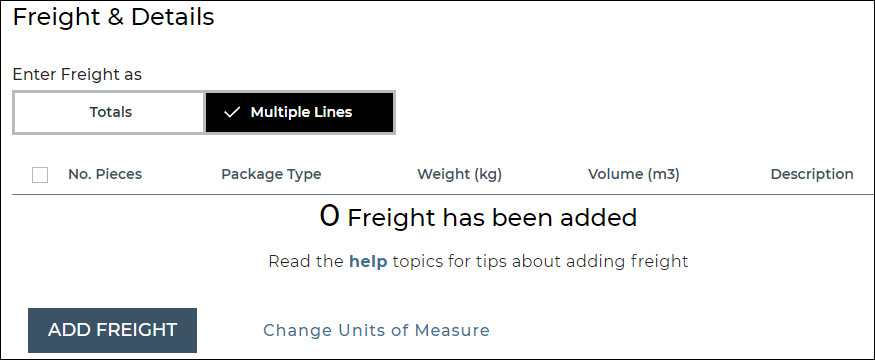
Figure 11: Freight & Details Section - Multiple Lines
To Add Multiple Lines of Freight:
1 Click Add Freight to fill in details about the freight including the Freight Description, Pieces, Weight, and Volume.
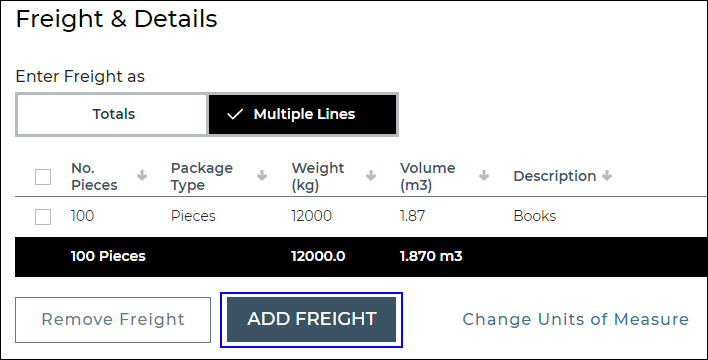
Figure 12: Freight & Details - Multiple Lines
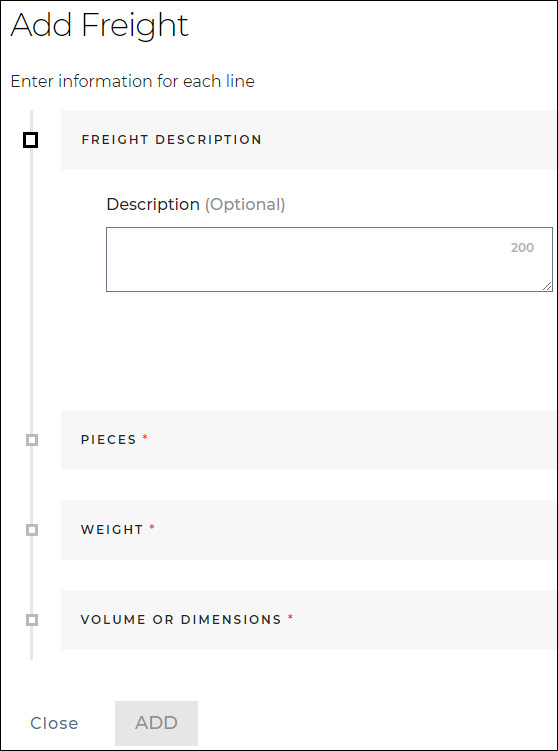
Figure 13: Add Freight
2 For the Weight, enter the Weight per Piece and the Total Weight will be automatically calculated for you.
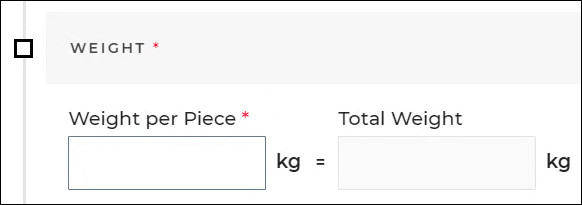
Figure 14: Weight
3 For the Volume, click the I want to enter drop-down list to select how you want to enter the volume, for the outer dimensions options, enter the Length, Width, and Height and the Total Volume will be automatically calculated for you.
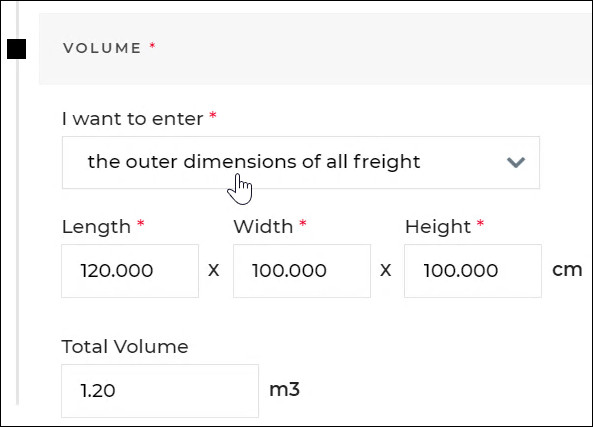
Figure 15: Volume - Outer Dimensions of All Freight
4 Click Add and continue to click Add Freight until you have entered all of the freight.
To remove freight, select the check box next to the row of the freight you want to remove and click Remove Freight.
You can click Change Units of Measure at any time to change your preferred units of measure.
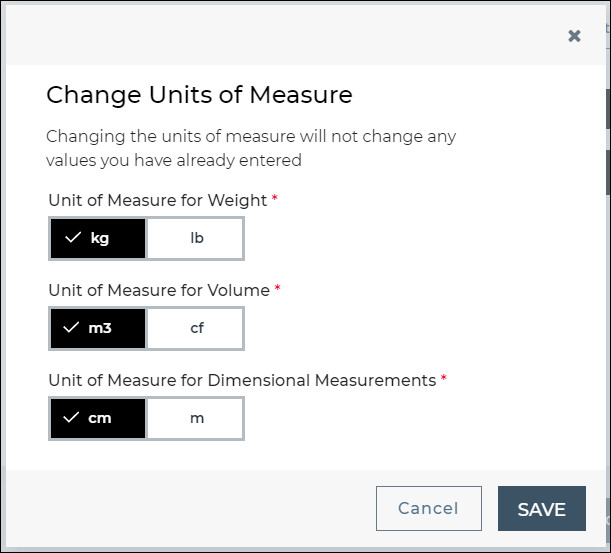
Figure 16: Change Units of Measure
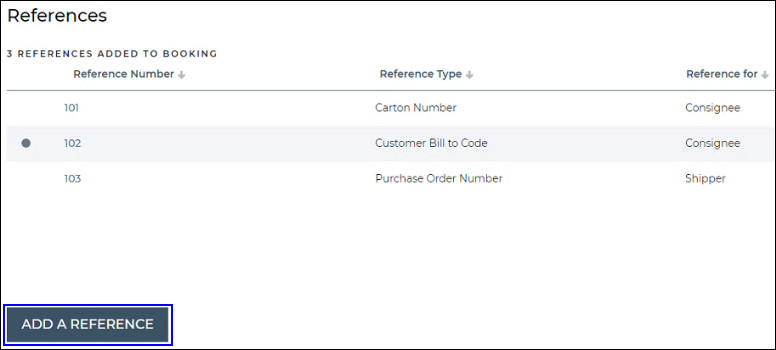
Figure 17: Reference Section
Click Add A Reference to open the Add a Reference panel where you can enter the Reference Number, select the Reference Type from the drop-down list and select if the reference is for the Consignee or Shipper. You can also optionally make it the primary reference by selecting the Make Primary Reference check box. A circle will appear in the row of the reference that has been marked primary.
To delete a reference or change its primary status, click the menu icon () and select Remove As Primary or Delete.
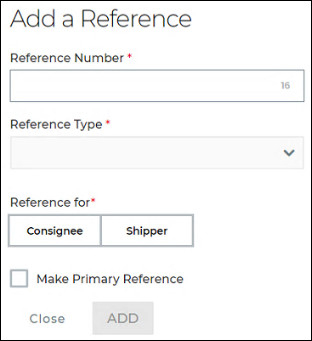
Figure 18: Add A Reference Panel
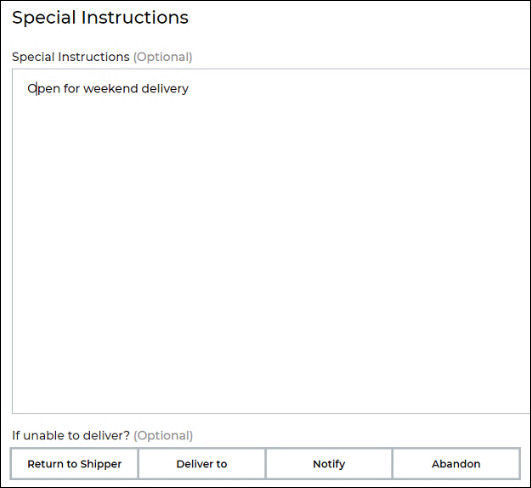
Figure 19: Special Instructions
Enter up to 2000 characters for the Special Instructions section. You can also select what should happen to the freight if it is Unable to be delivered. Depending on what you select, make sure to enter any additional details in the Special Instructions field.

Figure 20: Documents Section
Click Browse to select documents to upload to the booking or click and drag the files to this section to upload them. Select the Document Type from the drop-down list and enter a Document Description. Click Delete in the lower right-hand corner of the document panel to delete the document. To download or view uploaded documents, click the document name.